Interactive row selection prototype with Datasette
I added a new llms tag to my blog, for my content about Large Language Models.
I wanted to quickly populate it with content. I decided to run some SQL queries to find likely candidates using the Datasette backup of my blog’s content.
But… I didn’t just want to add anything that mentioned “LLM” - I wanted to have a step where I curated the selected items and picked just the ones that were a good fit.
What I really needed was a UI that could let me select items from a Datasette list.
So I built one with ChatGPT. The sequence of prompts I used was:
- JavaScript to prepend a
<input type="checkbox">to the first table cell in each row of a table - Only output the JavaScript code. Add code that sets it up to holding shift and clicking a box selects all other boxes between the clicked box and the previously selected one
- Make it so the very first checkbox behaves differently: when checked, it checks ALL other boxes - when unchecked it unchecks them all
Here’s the full ChatGPT transcript.
This gave me the exact code I was looking for. I made a couple of tiny tweaks (adding some margin next to the checkboxes and updating the CSS selector to grab the table), then pasted that modified code back in and said:
- Modify the above code to also add a textarea to the page directly above the table. The textarea should display a JSON array of values corresponding to the checked checkboxes - those values are the innerText content of the table cell each checkbox is contained within
The resulting code looked like this:
const table = document.querySelector('table');const rows = table.getElementsByTagName('tr');let lastChecked = null;
function prependCheckboxes() { for (let i = 0; i < rows.length; i++) { const checkbox = document.createElement('input'); checkbox.type = 'checkbox'; checkbox.style.marginRight = '8px';
if (i === 0) { checkbox.addEventListener('click', handleFirstCheckboxClick); } else { checkbox.addEventListener('click', handleCheckboxClick); }
const firstCell = rows[i].cells[0]; firstCell.insertBefore(checkbox, firstCell.firstChild); }}
function handleFirstCheckboxClick(e) { const mainCheckbox = e.target; const checkAll = mainCheckbox.checked;
for (let i = 1; i < rows.length; i++) { const row = rows[i]; const currentCheckbox = row.cells[0].querySelector('input[type="checkbox"]'); currentCheckbox.checked = checkAll; }
updateTextarea();}
function handleCheckboxClick(e) { const checkbox = e.target; let inBetween = false;
if (e.shiftKey && checkbox.checked && lastChecked) { for (let i = 0; i < rows.length; i++) { const row = rows[i]; const currentCheckbox = row.cells[0].querySelector('input[type="checkbox"]');
if (currentCheckbox === checkbox || currentCheckbox === lastChecked) { inBetween = !inBetween; }
if (inBetween) { currentCheckbox.checked = true; } } }
if (checkbox.checked) { lastChecked = checkbox; } else if (lastChecked === checkbox) { lastChecked = null; }
updateTextarea();}
function createTextarea() { const textarea = document.createElement('textarea'); textarea.rows = 5; textarea.style.width = '100%'; textarea.style.marginBottom = '16px'; table.parentNode.insertBefore(textarea, table); return textarea;}
function updateTextarea() { const checkedValues = [];
for (let i = 1; i < rows.length; i++) { const row = rows[i]; const currentCheckbox = row.cells[0].querySelector('input[type="checkbox"]'); if (currentCheckbox.checked) { checkedValues.push(row.cells[0].innerText); } }
textarea.value = JSON.stringify(checkedValues);}
const textarea = createTextarea();prependCheckboxes();I constructed the following SQL query:
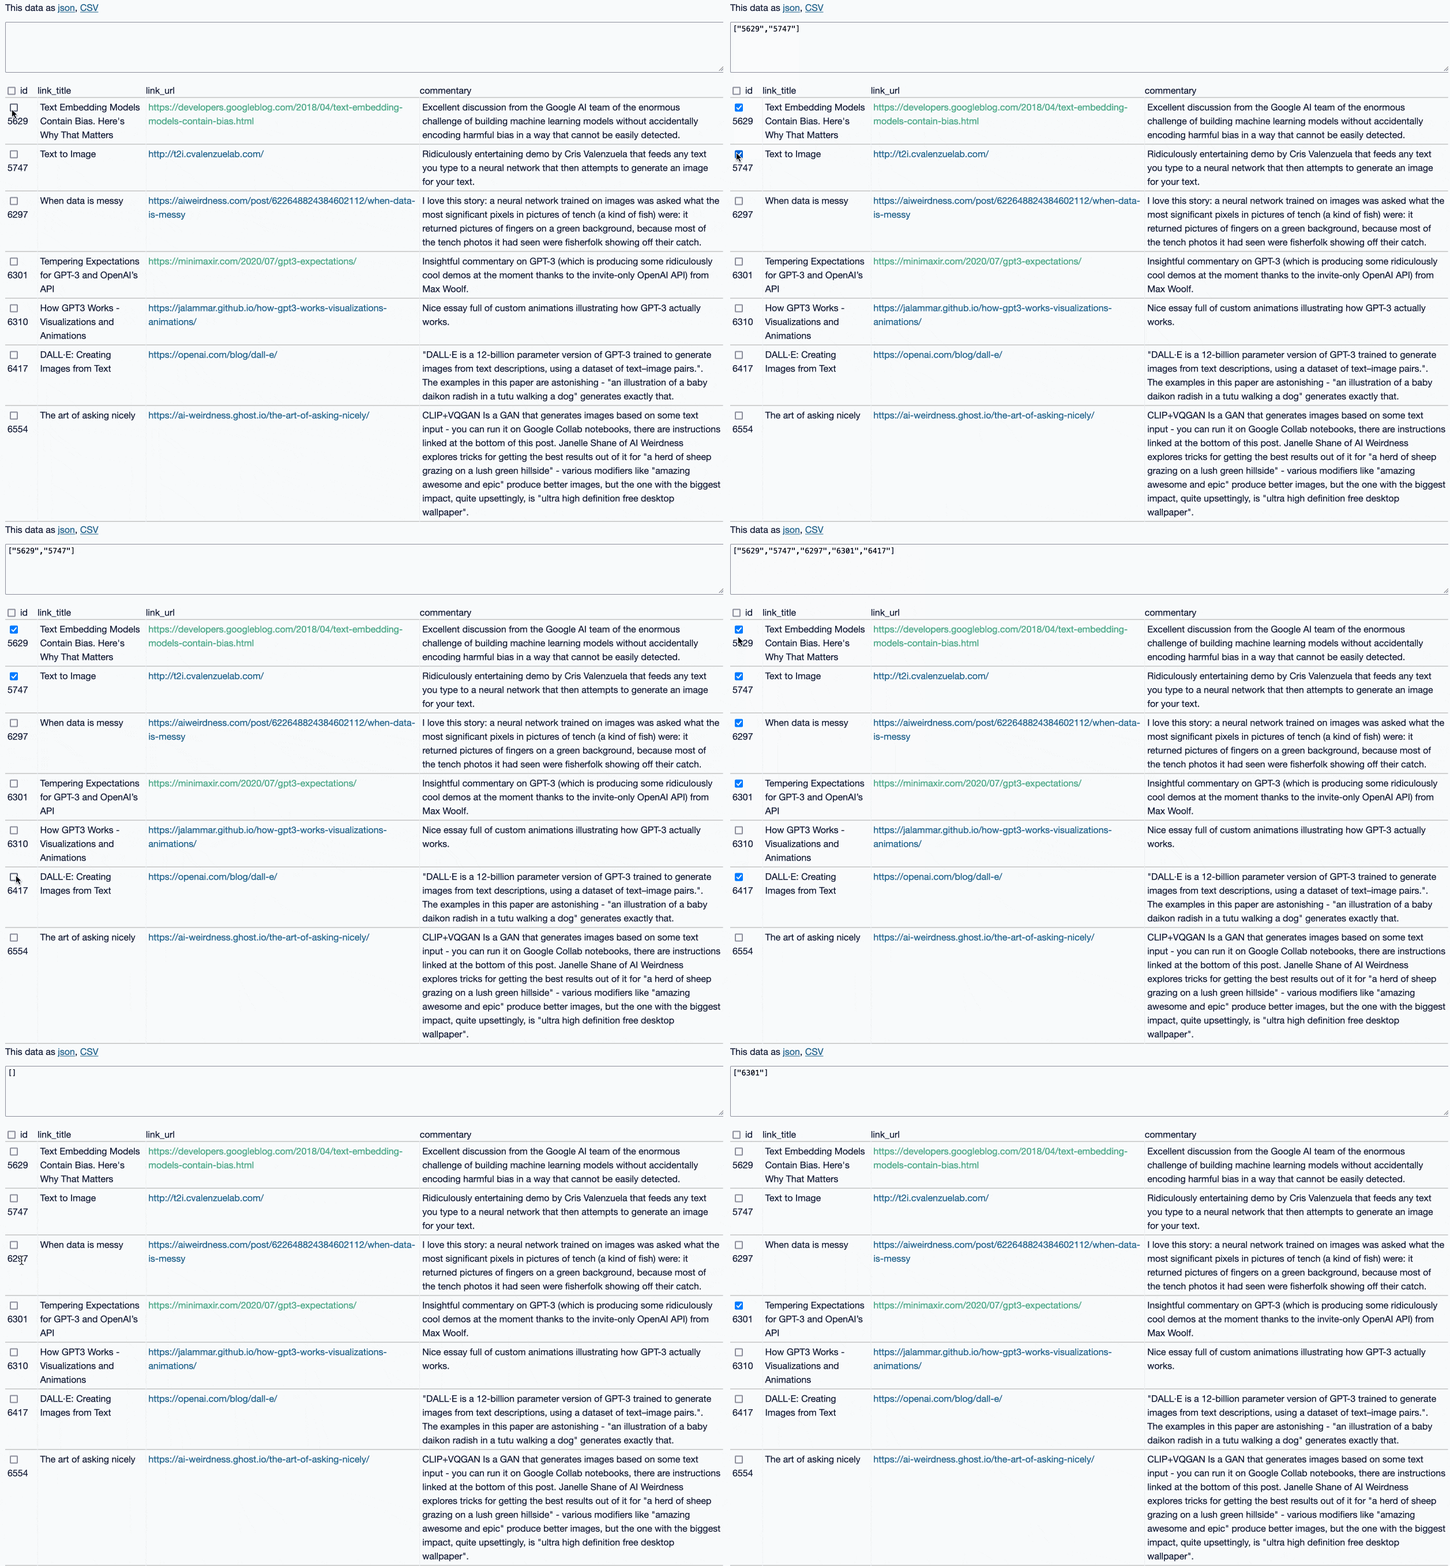
select id, link_title, link_url, commentaryfrom blog_blogmarkwhere id in ( select blogmark_id from blog_blogmark_tags where tag_id in ( select id from blog_tag where tag in ( 'generativeai', 'ai', 'gpt3', 'promptengineering' ) ))Then I opened up the Firefox console and pasted in that JavaScript. Here’s the result:

I used this query, and two others like it, to create an array of IDs of entries, blogmarks and quotations that I wanted to add the llms tag to.
Having generated those arrays, I applied the tag using the /manage.py shell Django command running in Heroku:
heroku run bash -a simonwillisonblogThen in Heroku:
./manage.py shellAnd in the Python console:
>>> from blog.models import Blogmark, Tag, Entry, Quotation>>> tag = Tag.objects.get(tag='llms')>>> tag<Tag: llms>>>> blogmark_ids = ["6301","6310","6815","6850","6853","6869","6876","6929","6940","6967","6969","6980","6981","6993","7018","7021","7025","7027","7029","7030","7031","7032","7036","7037","7038","7039","7040","7041","7045","7046","7047","7048","7049","7050","7052","7053","7054","7056","7057","7058","7061","7062","7063","7070","7071","7075","7076","7077","7079"]>>> Blogmark.objects.filter(id__in=blogmark_ids)<QuerySet [<Blogmark: gpt4all>, <Blogmark: Cerebras-GPT: A Family of Open, Compute-efficient, Large Language Models>...']>>>> blogmarks = list(_)>>> len(blogmarks)49>>> for b in blogmarks:... b.tags.add(tag)>>> entry_ids = ["8169","8170","8171","8178","8189","8191","8192","8197","8214","8215","8217","8222","8223","8227","8229","8230","8231","8232","8233","8234","8236","8237","8238","8239","8240","8241","8242"]>>> quotation_ids = ["767","890","893","929","933","936","937","941","942","946","947","948","950","951","952","954","955","956","957","958","959","960","961","962","963","964","965","966","968","969","970","971","972"]>>> entries = list(Entry.objects.filter(id__in=entry_ids))>>> quotations = list(Quotation.objects.filter(id__in=quotation_ids))>>> for e in entries:... e.tags.add(tag)>>> for q in quotations:... q.tags.add(tag)And that’s how I populated the https://simonwillison.net/tags/llms/ page on my blog!
At some point I plan to turn this JavaScript code into a Datasette plugin.
